If you're looking for an Azure VM backup solution, you can find more information on our website, or start a free trial here.
PAGE CONTENTS
- Introduction
- What is supported?
- Guides
- How to add a virtual machine
- How to remove a virtual machine
- How to configure the backup schedule and retention
- How to recover a virtual machine
Introduction
Redstor gives you the ability to backup your Azure Virtual Machines to the same resource group within Azure, and recover them back to the source or to a different group. VMs are protected by deploying a virtual backup appliance into the Azure subscription where they are located. Snapshot backups consist of disk snapshots that are kept alongside the original VM, and are subject to the same security.
In addition, we offer Azure VM backups to the Redstor Storage Platform in the form of a service called Redstor Backup. Note that this functionality may incur additional costs. For Redstor Backup, you can choose between file-based and block-based backup. File-based backup allows file-level recovery, but not Full System Recovery (FSR). Block-based backup allows FSR to a new VM, but not file-level recovery. Only block-based backup supports backup of complex configurations like SQL VMs, encrypted disks, striped RAID volumes, and other non-traditional file-based volumes. Read more in Article 1615 - Block-based backup of Azure VMs: frequently asked questions.
To use our Azure VM backup service, you need to be both a RedApp company administrator, and an Owner of the Azure subscription for the virtual machines you want to back up.
What is supported?
Redstor currently supports the following:
- Backup and recovery of VHDX disk image files.
- Backup and recovery of PremiumV2_LRS disk type, as well as other premium-type SKUs, including Ultra SSD. This ensures parity in disk type between the source and target VMs (conditional on Azure supporting this disk type in-region).
Redstor does not currently offer native support for the following:
- VMs with unmanaged disks, including Azure Blob Storage, Azure Files, and Azure Queue Storage. These will not appear in the list when you select VMs to be protected. In an unmanaged disk, you manage the storage accounts that are used to store the virtual hard disk (VHD) files that correspond to your VM disks. VHD files are stored as page blobs in Azure storage accounts.
- Azure Virtual Desktop (AVD). AVD machines can be protected through snapshots or block-based backup (as explained in the Introduction), but these methods do not allow for single item recovery. If you want to be able to restore individual files and folders, install the ESE agent on each VM instead.
For more information, see Article 1526 - Azure backup and recovery: frequently asked questions.
Guides
Use the guides below to manage your backups.
How to add a virtual machine
Note: To add VMs for the first time, the user must have an Owner role in Azure. Subsequent VMs can be added by users with the Contributor role in Azure.
1. In the RedApp, go to the home page for the customer company you want to add backups for. Click on the search icon at the top right to find a specific customer.

2. Click on Azure in the sidebar and then on Virtual Machines. If you do not see Azure Virtual Machines listed, you will need to add it as a product.


4. Go to Add at the top right and click Add virtual machines.

5. You will now need to log into Azure and allow Redstor access to your resource groups. Click Next to proceed.

6. Authenticate with your admin credentials and accept the requested permissions.
7. You will be shown a list of VMs that your Azure user has access to, and that are located in a subscription that is not yet protected by Redstor. Select one or more VMs from the list (all are selected by default) and click Add. This will queue the deployment of a new virtual backup appliance into the relevant subscription.
Note:
- The appliance will be deployed into the region of the first VM listed.
- Once an appliance has been deployed into a subscription, you will not need to repeat this process when adding new VMs to be backed up.
- If you make use of the Storage Platform Console, you will not see any Azure VM backups there unless Redstor Backup (see below) is enabled.
Once the appliance has been deployed, you can back up the VMs in that subscription. For an individual VM, click on the menu icon to its right and then on Backup.
Note: If you are experiencing issues adding or recovering VMs, see Article 1473 - Azure backup and recovery troubleshooting.

You can also select multiple VMs and click Backup at the bottom of the page.

Redstor Backup (formerly Redstor Protect)
You can enable Redstor Backup (formerly known as Redstor Protect) using the toggle switch on the Backup schedule card of any VM. This means that for the selected VM, all backups stored in Azure will also be copied to the Redstor Storage Platform for off-site storage at an additional cost.
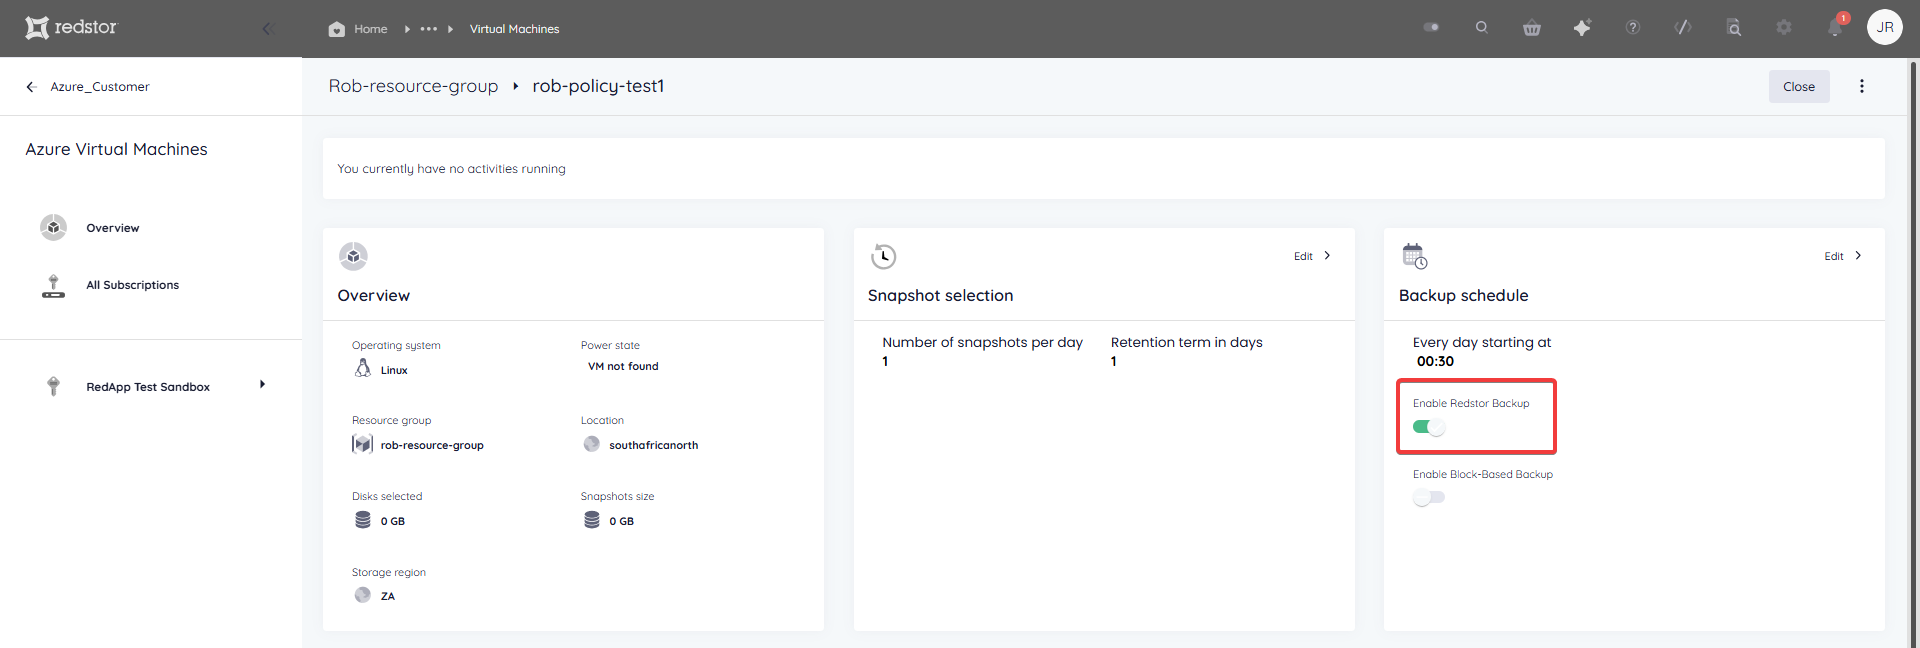
To backup complex configurations like SQL, RAID configurations that make use of striping, and encrypted disks, you will need to enable block-based backup in addition to Redstor Backup. Read more in Article 1615.
Note: If you enable only Redstor Backup, your backups will be file-based and you will be able to do file-level recovery, but not Full System Recovery (FSR). If block-based backup is enabled, you will be able to do FSR to a new VM, but not file-level recovery.

The status of a specific Redstor backup can be seen by hovering over the relevant entry in the Redstor Backups tab on the overview page. A Pending status means the backup task is in a queue to be processed, while a Deferred status means the backup task cannot start because another backup is still running.

Auto-add new VMs
On the home page for the specific backup set, you can enable Automatically add all new VMs at the top right to ensure all your VMs remain protected without the need for manual intervention.

Note:
- When you enable auto-add for the first time, the system may take a few minutes to update. You will also need to authorise the action by logging into Azure.
- When you enable auto-add, we send a request to your Azure portal to install Azure Event Grid, a fully managed event routing service that allows different applications and services to communicate through events. This allows real-time triggering of actions when certain events occur, such as changes to data in storage or new virtual machines being created.
- You will be able to view the Event Grid in your subscription. If you delete the Event Grid on your Azure portal, the auto-add feature will stop working. If you disable auto-add in the RedApp, the Event Grid deployment on the subscription is not deleted, to allow for faster re-enabling of auto-add.
- Azure Event Grid incurs a small fee for each operation (publishing events, delivering events, retries, and advanced filtering). However, the first 100 000 events per month are free, and Redstor's usage should remain well within this limit.
How to remove a virtual machine
Note: Azure VM removal is not reversible. Removing individual VMs and/or the Azure VM product in the RedApp will result in the permanent deletion of any existing data for the applicable VMs from our Storage Platform. This cannot be undone.
1. Go to the relevant resource group in the sidebar.
2. For the VM you want to remove, click on the the menu icon to its right and then on Remove.

For multiple VMs, make your selection and click Remove at the bottom of the page.

You will see a notification that the machine/s have been removed.
How to configure the backup schedule and retention
Note:
- Where Redstor Backup is enabled, retention for Azure VMs is the retention period that is set for the relevant group/folder or collection (or the default retention period if none has been set).
- Whether or not Redstor Backup is enabled, 30 days of snapshots are retained by default.
To set the backup schedule:
1. On the home page for the relevant resource group, click on Backup Schedule > Edit.

2. You can retain the default of a single daily backup (Daily), or you can set your backups to run only on specific days (Custom). In either case, use the drop-down menu to set the backup time. Set your preferences, then click on the check mark at the top right to apply them.


From the Snapshot selection card, you can also set the number of snapshots to be taken per day (up to 24) and the retention of these snapshots (up to 90 days). Click on the check mark to save your choice.
Note: Our system takes a snapshot at the time of backup which is retained in addition to the number of backups you select here. For example, if you set the number of snapshots as 12, we will retain 13 backups.

Policies
To apply the same snapshot schedule and retention settings across a number of VMs, you can assign them to a policy. Note that policies currently allow for only snapshot rules.
1. First, create the policy by clicking on All Policies in the sidebar.

2. Click on Add policy > Azure VM at the top right.

3. Enter a name and description for the policy, then click Next.

4. Select the VMs to assign to this policy and click Next.

You can also choose to include VMs from your own company and/or auto-include all VMs from new customers.

5. Set the snapshot schedule and retention for the VMs under this policy, then click Create. You will then need to authenticate with Microsoft to complete this step.

Note: When choosing the number of snapshots and retention, keep in mind that Azure has a 500 snapshot limit per virtual machine, which includes any snapshots created in the Azure Portal.
You can remove a VM from a policy at any time by going to the VM's page in the RedApp and clicking Remove from policy at the top right.

How to recover a virtual machine
To recover Azure VMs, you need to be both a RedApp company administrator, and an Owner of the Azure subscription where the VMs are located. You will need to authenticate before any recovery.
Note:
- If you are using Redstor Backup for Azure VM Pro, Full System Recovery to any other target is NOT possible. That means if these snapshots are removed, your only option is file-level restore.
- Azure Disk Encryption is supported. If the source VM was created with Azure Disk Encryption, the restored VM will have the same level of encryption, whether overwriting the source or restoring to a new VM.
When recovering a VM, the available recovery options depend on the type of backup (snapshot/Redstor Backup/block-based backup). For any VM, backups of specific types are grouped under tabs in the RedApp interface.

To see the recovery options for a backup, click on the the menu icon to its right.

Options that are not available will be greyed out.

The table below shows which recovery options can be used for which types of backup.
|
| FSR to current VM | FSR to new VM | InstantData / File-level recovery |
Snapshots |
| x | x | x |
Backups | Redstor Backup (file-based) |
|
| x |
| Block-based backup |
| x |
|
Recovery steps for each option
Follow the steps below based on your choice of recovery option.
Full System Recovery to current VM
This option reverts the backed-up VM into its original location. After selecting this option, no further steps are needed.
Full System Recovery to new VM
This option restores the data into a new, functionally identical VM in a resource group of your choice.
1. Specify a name for the new VM, and select a resource group for it to be located in. You can also configure the region, VNet and subnet (default = source VM configuration), as well as the VM's power state when recovering (default = off). When you're ready, click Next to proceed.
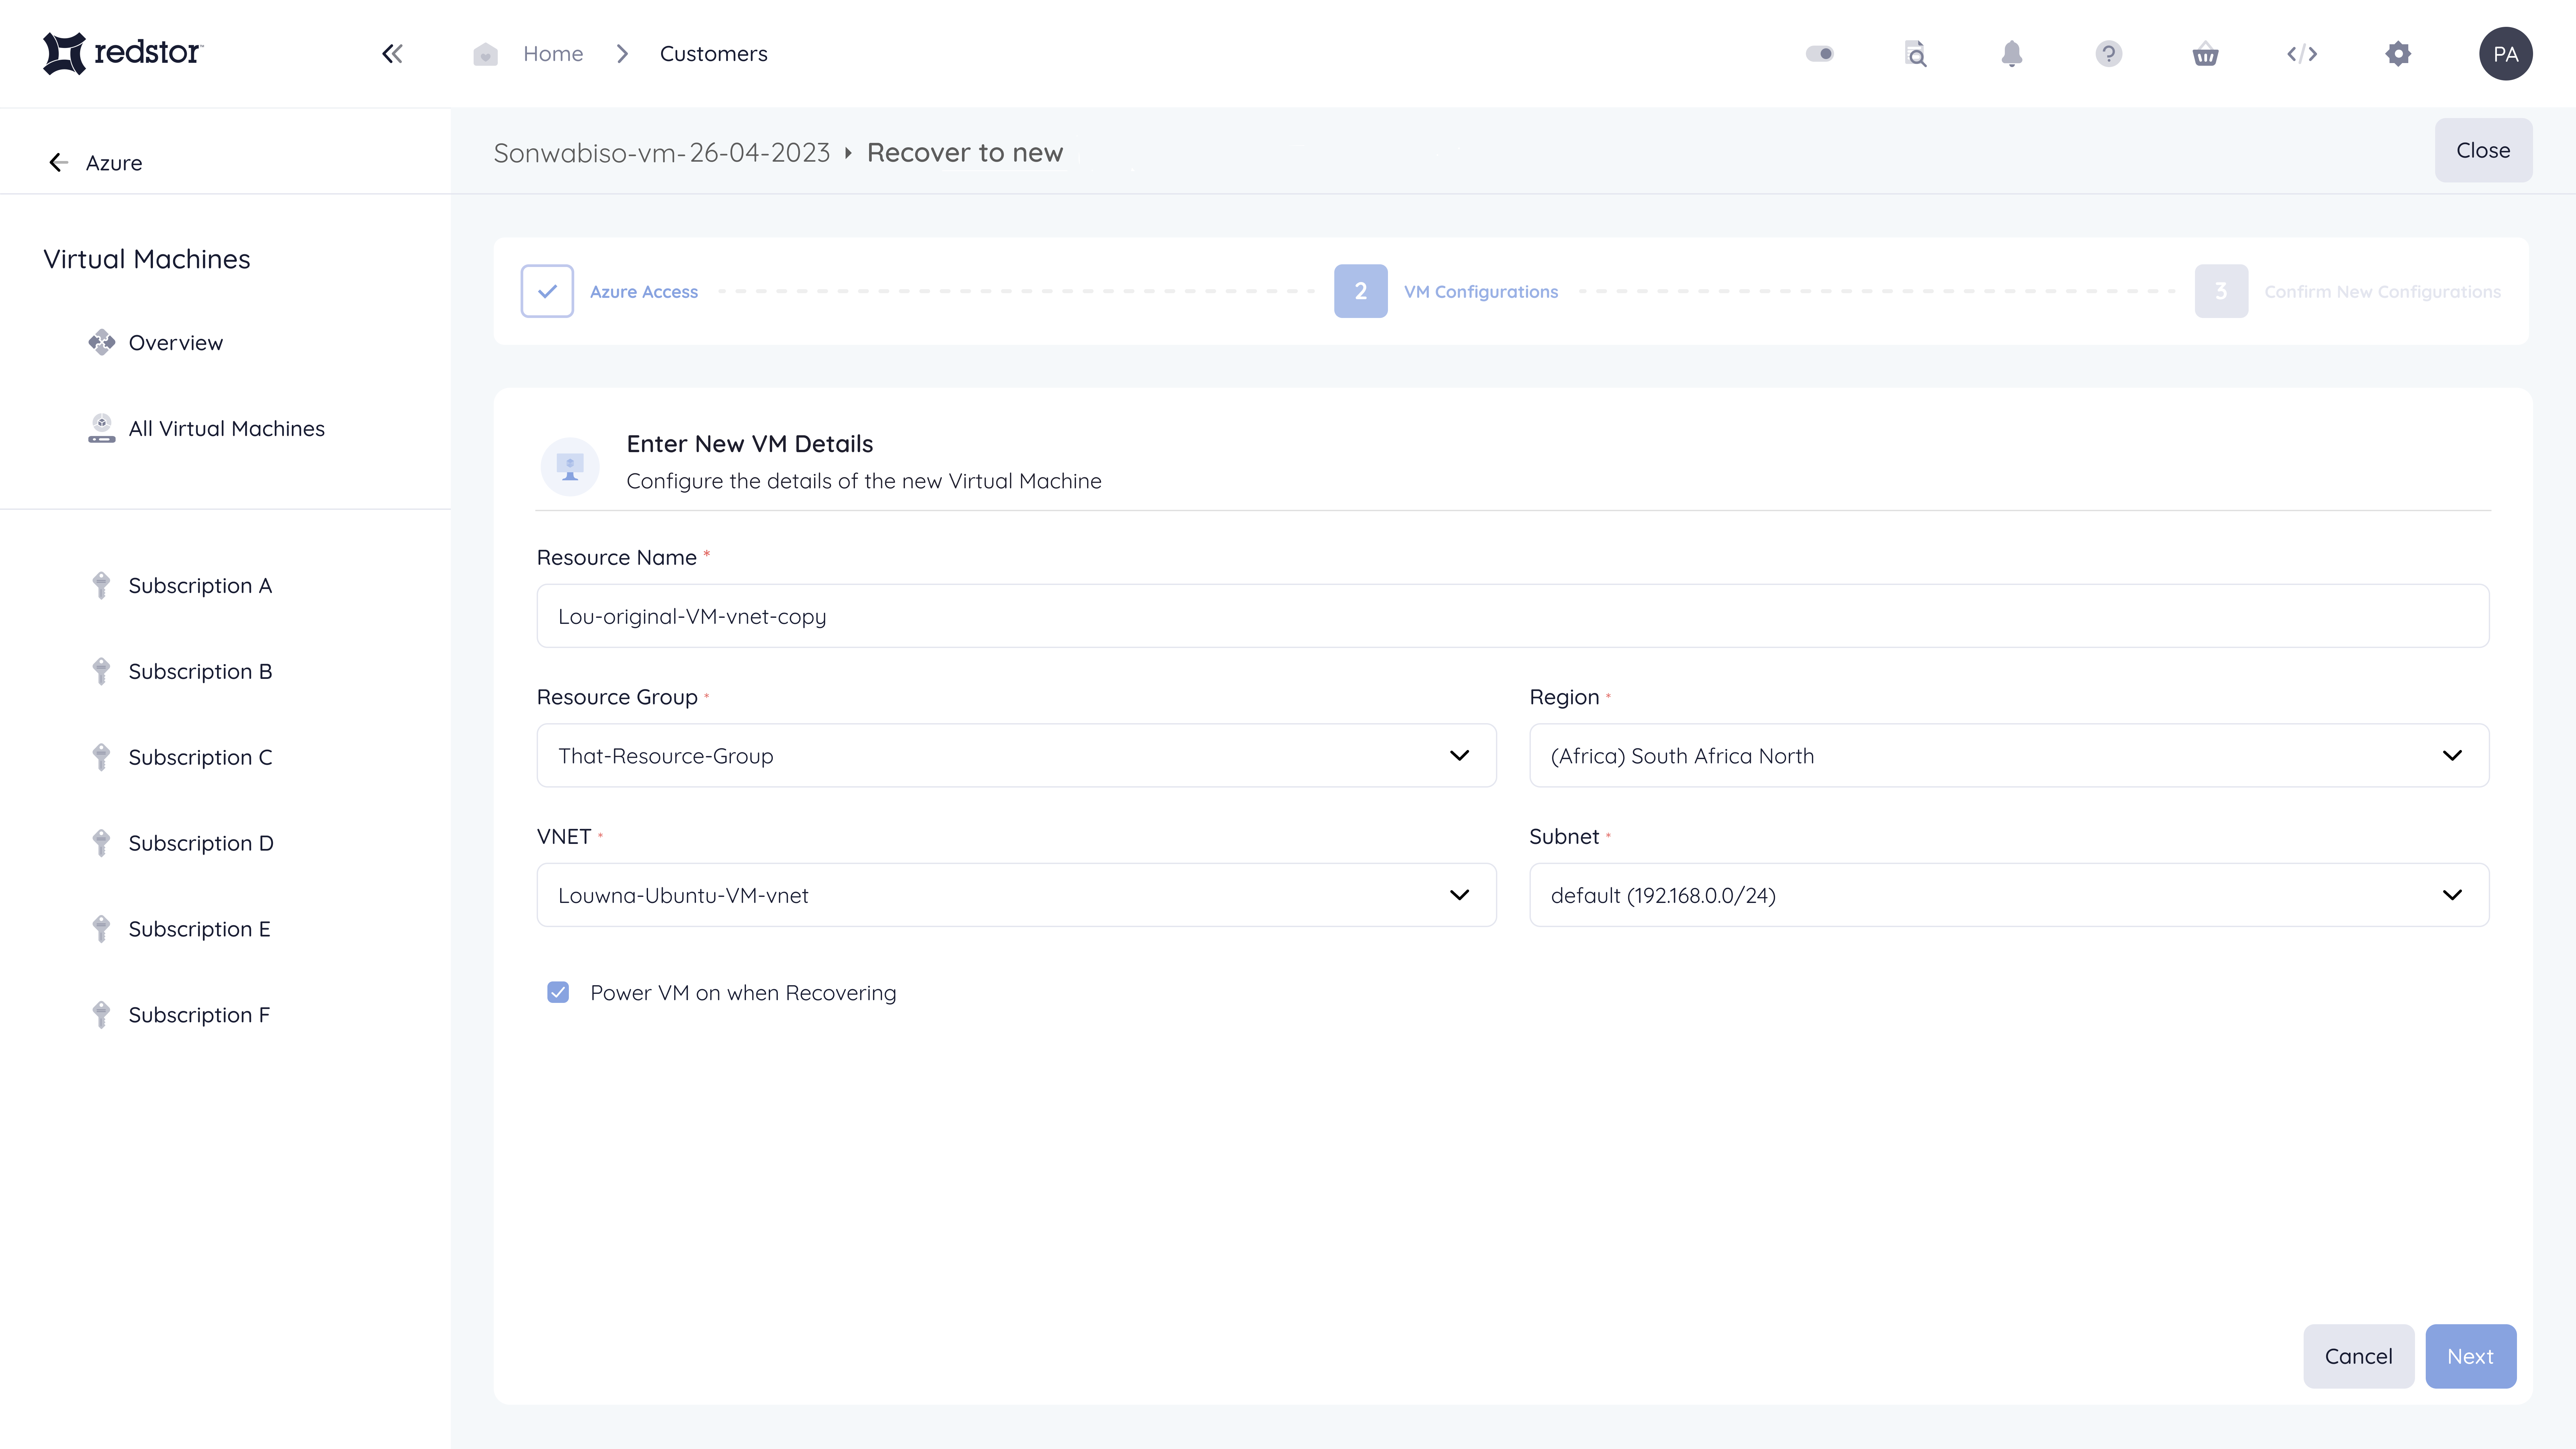
2. Confirm the selected settings and click Recover.
Recover specific files
This option (for snapshots only) allows you to browse the contents of a VM snapshot from within the RedApp and select files and folders to download.
1. Once you have located the VM you want to recover from, drill down into the VM contents and select your files.
2. Click Download. The file/s will be downloaded to a zip file.
3. Open the zip file to access the recovered files in your File Explorer.
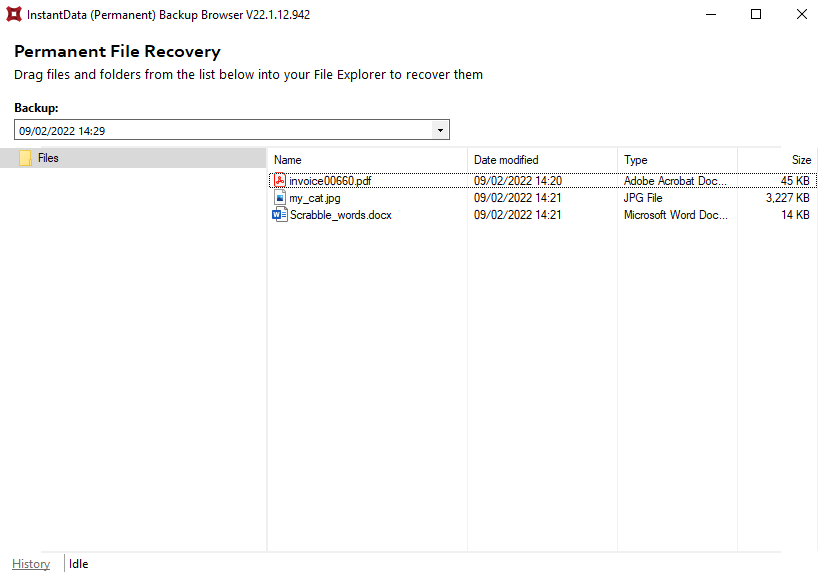
Recover with InstantData
This option generates a shareable link that can be used to recover the VM's data. Please note that InstantData is currently only supported on Windows.
1. Download the InstantData agent onto the machine where you want to recover the data. Each agent can only be used to initiate one restore.
2. Run the application.
3. Select between permanent and temporary recovery.

4. Drag and drop files from the application into your File Explorer to recover them.
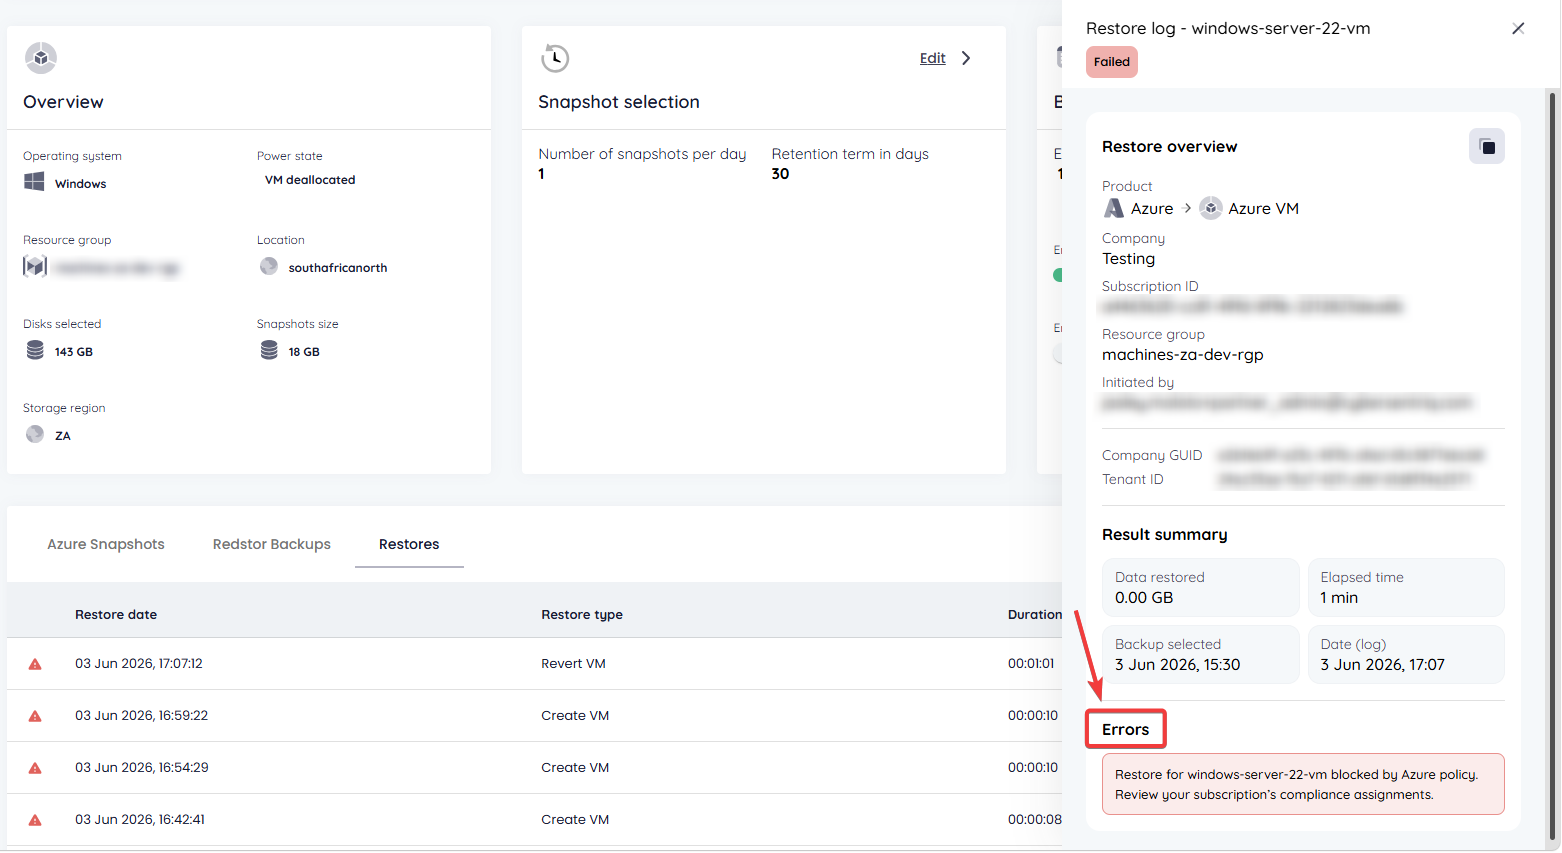
Recovery troubleshooting
If a recovery fails, you can find helpful information for troubleshooting by going to the Restores tab. Open the menu for the specific failure entry and go to View details.
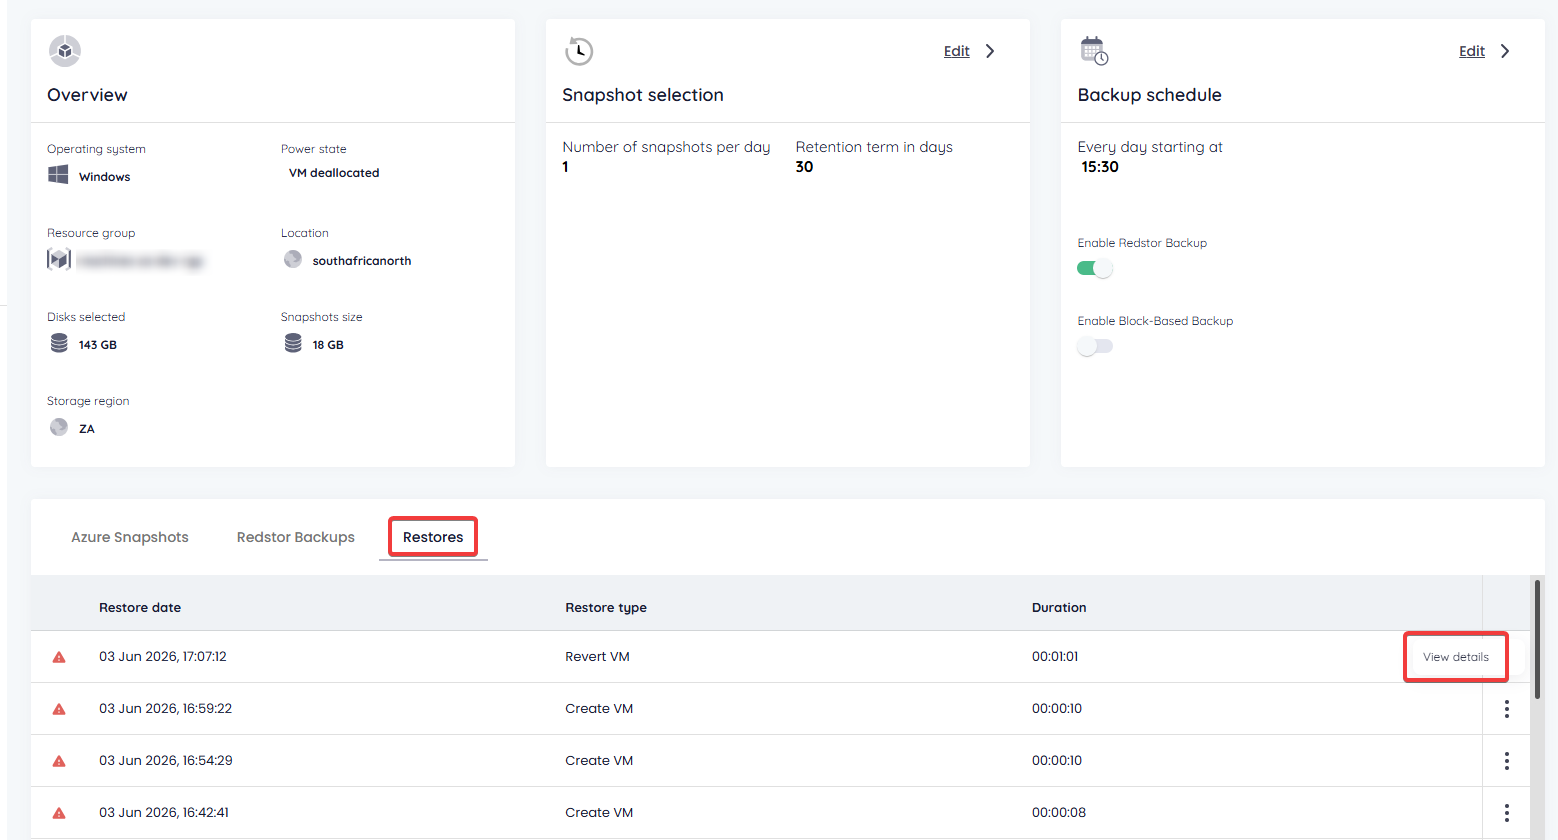
You will see details about the VM and the recovery attempt. At the bottom of the restore log, under Error, you will see the cause of the failure. See Article 1473 - Azure backup and recovery troubleshooting for more information.
Was this article helpful?
That’s Great!
Thank you for your feedback
Sorry! We couldn't be helpful
Thank you for your feedback
Feedback sent
We appreciate your effort and will try to fix the article