Profiling enables you to apply rules configured on the Storage Platform to all ESE Agents belonging to a particular Group. Rules may relate to backup set inclusions/exclusions but also to aspects of backup management, such as backup times and local copies. Profiled settings take precedence over any settings specified in the Agents themselves. To check which setting takes precedence in a given case, see Article 586.
To enable and configure profiling, open the Storage Platform Console in the Account Management view. Right-click the name of the relevant Group and click Configure. In the dialog box that appears, go to the Profiling tab. Tick Enable Profiling at the top.
Option enforcement
To enforce a particular option across all Agents in the Group:
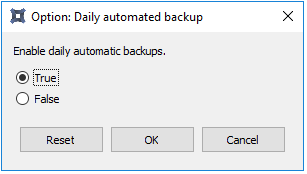
1. Double-click the option in the Available Options box.
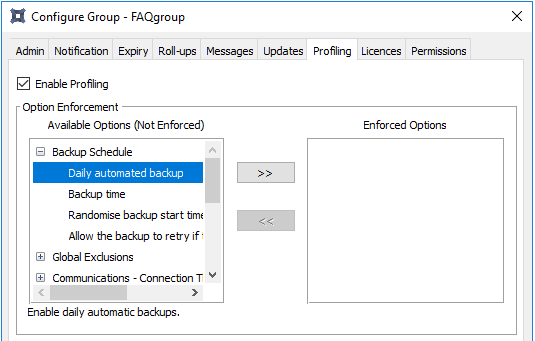
2. In the dialog box that appears, specify the setting(s) to be enforced. Click OK.
Note: To remove an option, click on the option in the Enforced Options list and click the << button.
Global exclusions
The global exclusions node allows you to exclude all files with certain file names, extensions or last modified dates from all backups in the Group. Exclusions that apply only to a specific Account can also be set in the Agent itself (see Article 1142).
To exclude files in this way:
- Expand the Global Exclusions option.
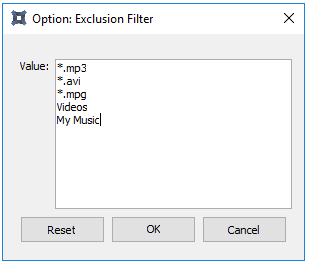
- Double-click Exclusion Filter.
- In the dialog box that appears, specify the file name(s) and/or file extension(s) to be excluded, then click OK.
Example: Exclude all files of the type MP3, AVI or MPG, as well as the folders Videos and My Music and their contents, from all backups.
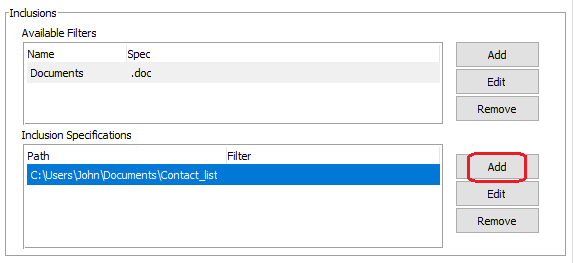
Inclusions
To always include certain file extensions in backups of Accounts in this Group:
1. Under Available Filters, click Add.

2. In the dialog box that appears, create a name for the filter and specify the extensions to always be included.
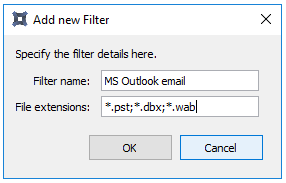
3. Click OK.
To always include a certain file or folder in backups:
1. Under Inclusion Specifications, click Add.
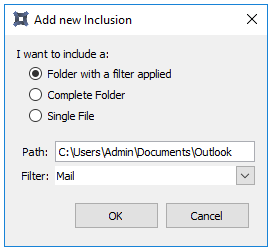
2. In the dialog box that appears, select an option:
- Folder with a filter applied
Enter the path to the folder to be included, and choose a filter (as specified before) from the drop-down menu.
Example: All .pst files in C:\Users\Admin\Documents\Outlook
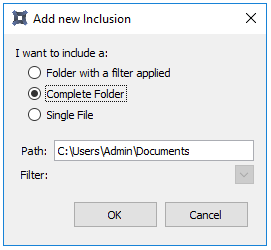
- Complete Folder
Enter the path to the folder to be included.
Example: The entire folder C:\Users\Admin\Documents
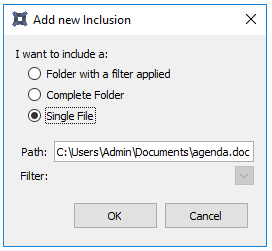
- Single File
Enter the path to the file to be included.
Example: The file agenda.doc in the folder C:\Users\Admin\Documents
3. Once you have selected an option, click OK.
4. Click OK again to close the Configure Group dialog box.
Additional information
- To expand an inclusion to all local drives, use %DRIVES% in the Path field.
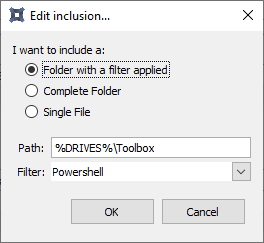
For example, %DRIVES%/Toolbox for a system with physical drives C, D, and E will expand to C:\Toolbox, D:\Toolbox and E:\Toolbox.
- The inclusion path may not contain a wildcard character (*), e.g. *:\ or C:\*xx\
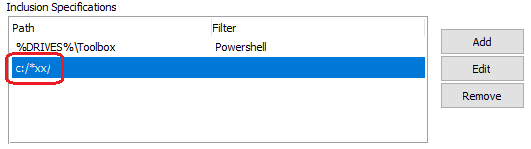
If a profiled inclusion rule contains a wildcard character, the rule will not be applied to the selection model and a warning will be logged:
WARN : 14:47:39 The profiled inclusion 'c:/*xx/' was not applied: A wildcard character may not
precede a path separator.
Was this article helpful?
That’s Great!
Thank you for your feedback
Sorry! We couldn't be helpful
Thank you for your feedback
Feedback sent
We appreciate your effort and will try to fix the article