One of the ways in which you can use InstantData is to recover an entire system to a new virtual machine. You can do this from the Storage Platform Console. Simply follow the instructions below based on your environment.
You can also recover to VMware from the command-line. See Parameters > Targets in Article 1184.
Note:
- To recover an entire system, you need to have a Full System Backup (FSB) of that data. Full System Recovery (FSR) can only be performed from a backup date on which an FSB completed. To enable FSB, switch on the radio button in your ESE Agent. The button will turn green. If you are backing up a VMware virtual machine, the Agent needs to run on the VM itself, and not on the host.
- Full System Recovery (FSR) has certain limitations that need to be taken into account.
- FSR to VMware requires a VDDK to be downloaded from our FSR resources blob storage. You will therefore need to either allow a network connection to this storage address or download the VDDK manually. Read more in Article 1306.
- FSR of a Linux system to VMware is not supported. Linux FSR can only be done to Azure (read more in Article 1281).
- If you are recovering to vSphere, follow these steps instead.
- See Article 1183 for supported VMware versions.
How to recover to a VMware virtual machine using InstantData
1. Access InstantData in one of the following ways:
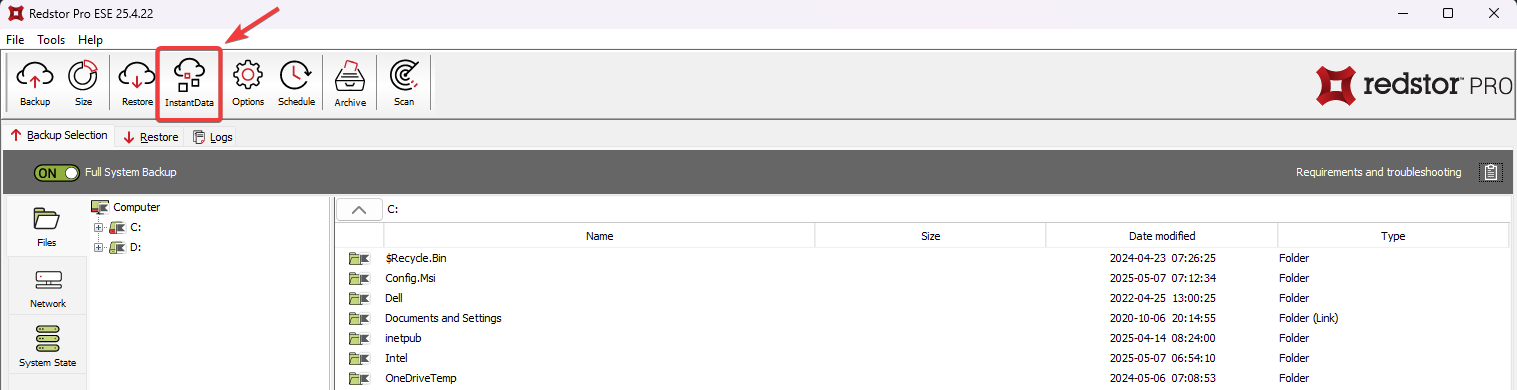
From the ESE agent on the machine you want to recover
Click on the InstantData button at the top of the interface.
From the RedApp
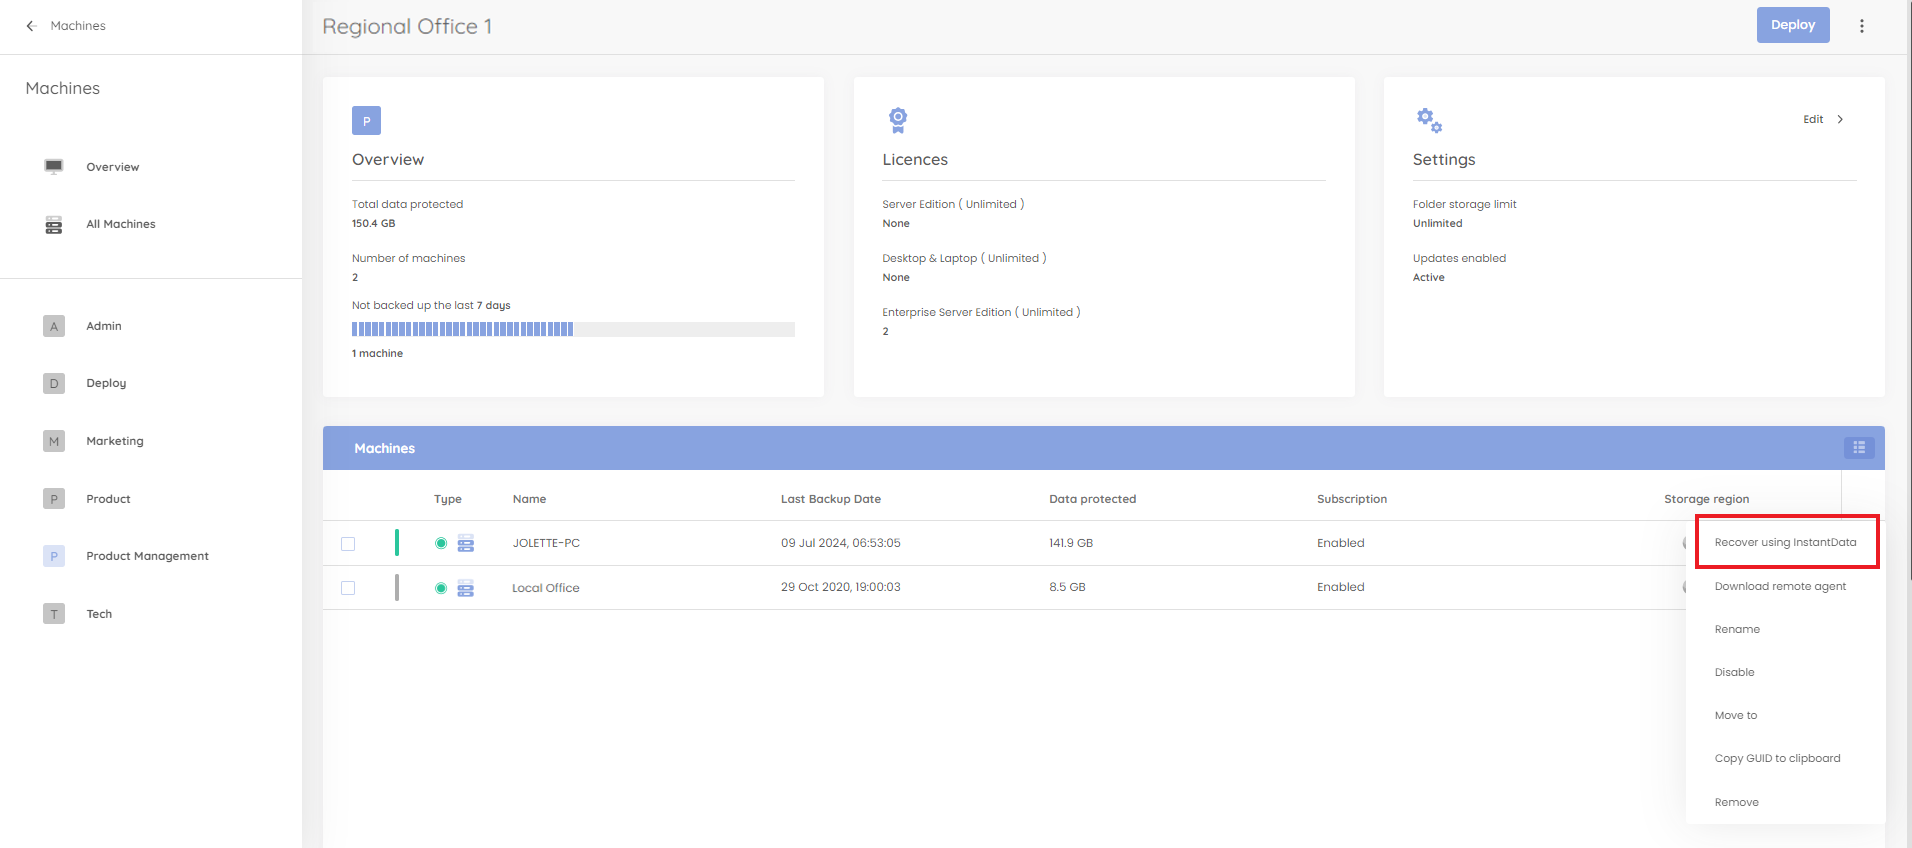
Locate the machine you want to recover. Expand its menu on the right, and click Recover using InstantData.
From the Storage Platform Console
Right-click the name of the account that your want to recover and click InstantData > Open.

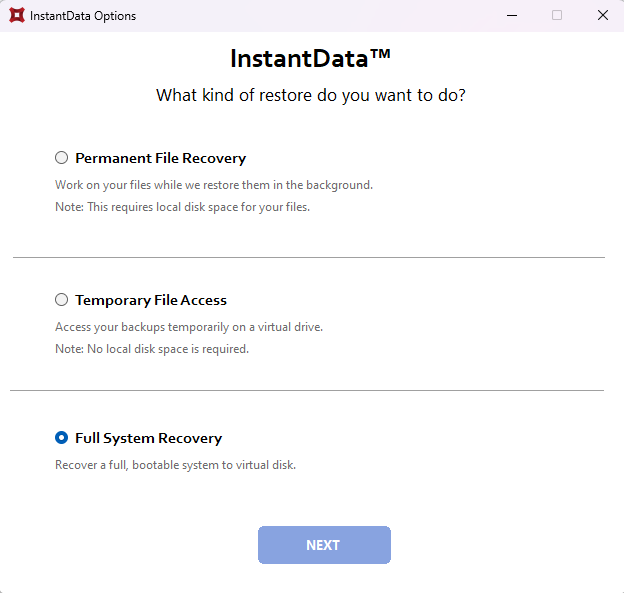
2. Select Full System Recovery and click Next.
3. Enter your encryption key and click Next.
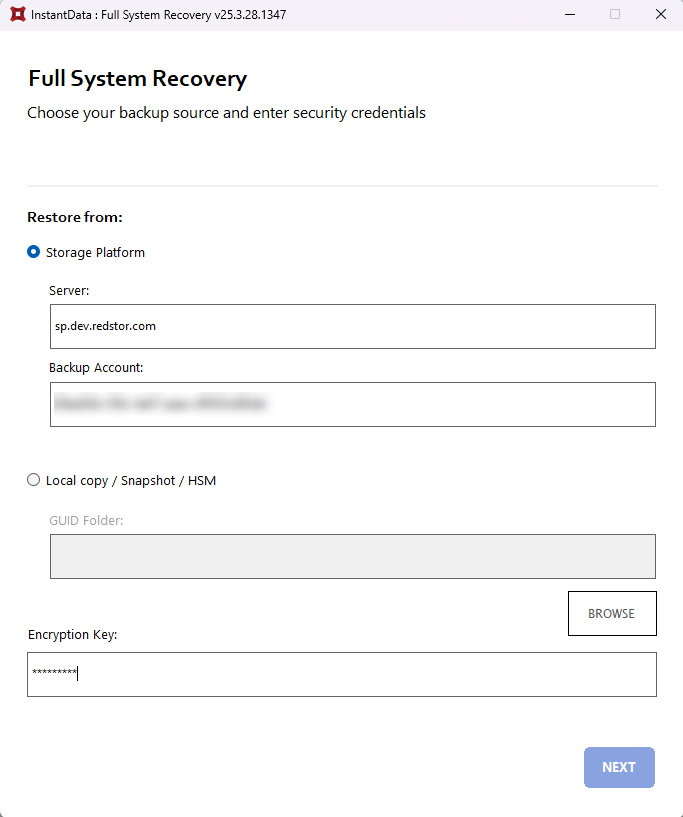
Note: The default behaviour is to restore the data from the Storage Platform. An alternative option is to restore the data from a local data source, e.g. local copy, snapshot or HSM. This is useful if the amount of data to be transferred is too large to transfer over the Internet within a limited time frame, or if no data connection is available, e.g. in a disaster recovery scenario. To do this, select the Local copy / Snapshot / HSM option and specify the path to the local data source.
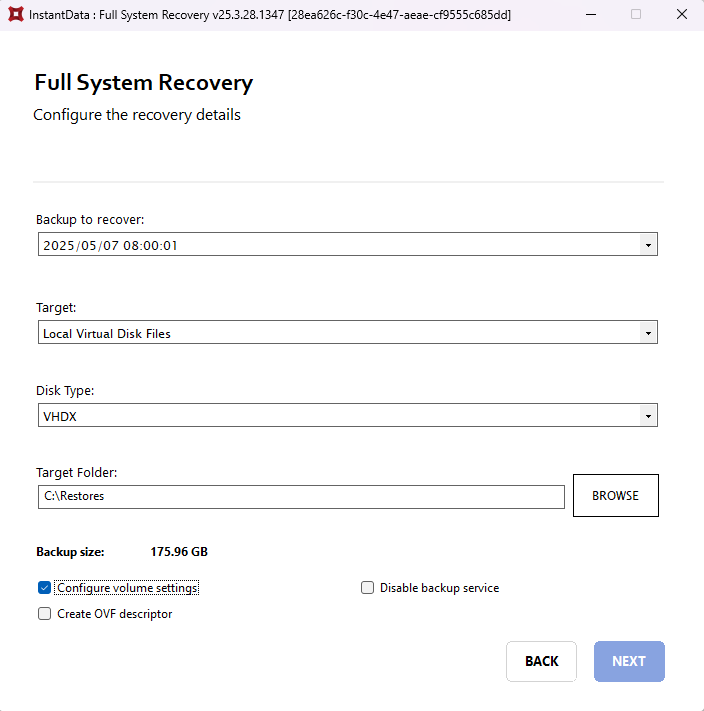
4. Select the backup you want to recover. Under Target, select Local Virtual Disk Files. Under Disk Type, select the relevant VMDK option. Under Target Folder, specify a location where the new virtual disk should reside.
Note:
- If you are recovering to vSphere, follow these steps instead.
- See Article 1183 for supported VMware versions.
In the case of a test recovery, it is best practice to tick Disable backup service, as this prevents having two machines (original and recovered) connected to the same backup account.
If you need to increase or decrease your volumes (e.g. because deduplication is enabled and more space is needed), tick Configure volume settings. Then click Next.
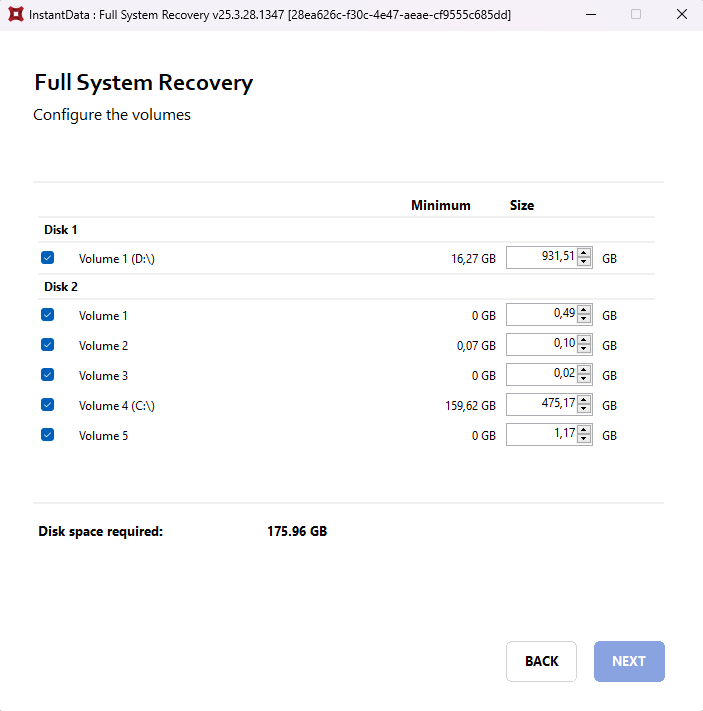
5. Adjust the volume sizes as needed and click Next. This will start the recovery process.
6. When the recovery is complete, copy the .vmdk files to a location that is accessible from the machine that will host the new virtual machine to which you will recover the data.
7. On the host machine, open vSphere and navigate to the folder in which you want to create your new virtual machine. Click Create a new virtual machine.
8. Under Edit settings > Select a name and folder, enter a name and select a location for your virtual machine.
9. Under Select a compute resource, choose the host on which the virtual machine will be run.
10. Click Next until you get to Select a guest OS. Choose your appropriate operating system and click Next.
11. Under Customize hardware, configure your settings, then select Existing Hard Disk from the New device drop-down menu at the bottom and click Add.
12. Select the appropriate file from in the Datastores workspace. Click Finish to complete the setup.
13. Right-click on the name of your new virtual machine and choose Power On.
Was this article helpful?
That’s Great!
Thank you for your feedback
Sorry! We couldn't be helpful
Thank you for your feedback
Feedback sent
We appreciate your effort and will try to fix the article