One of the ways in which you can use InstantData is to recover your files permanently.
Watch our how-to video below or read on for more detailed instructions.
1. Open the InstantData application
There are three ways to access InstantData to recover a machine: directly from the ESE agent for the machine, through the RedApp, and through the Storage Platform Console.
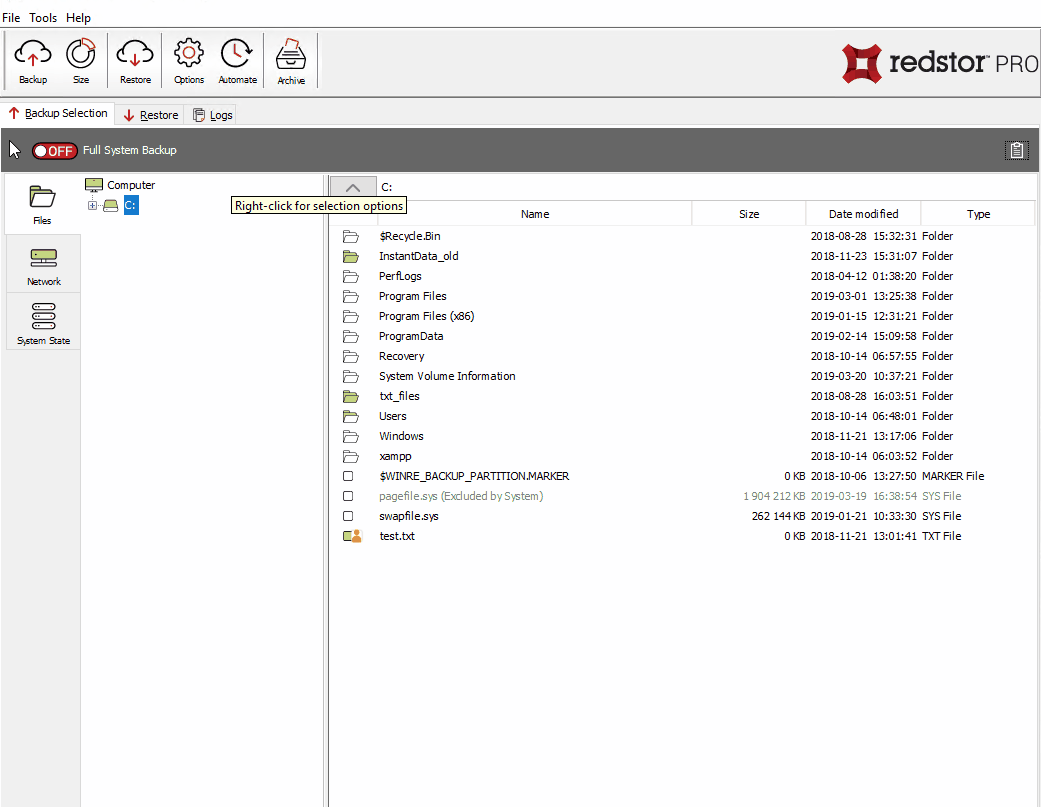
ESE agent
Click on the InstantData icon in the Restore tab.
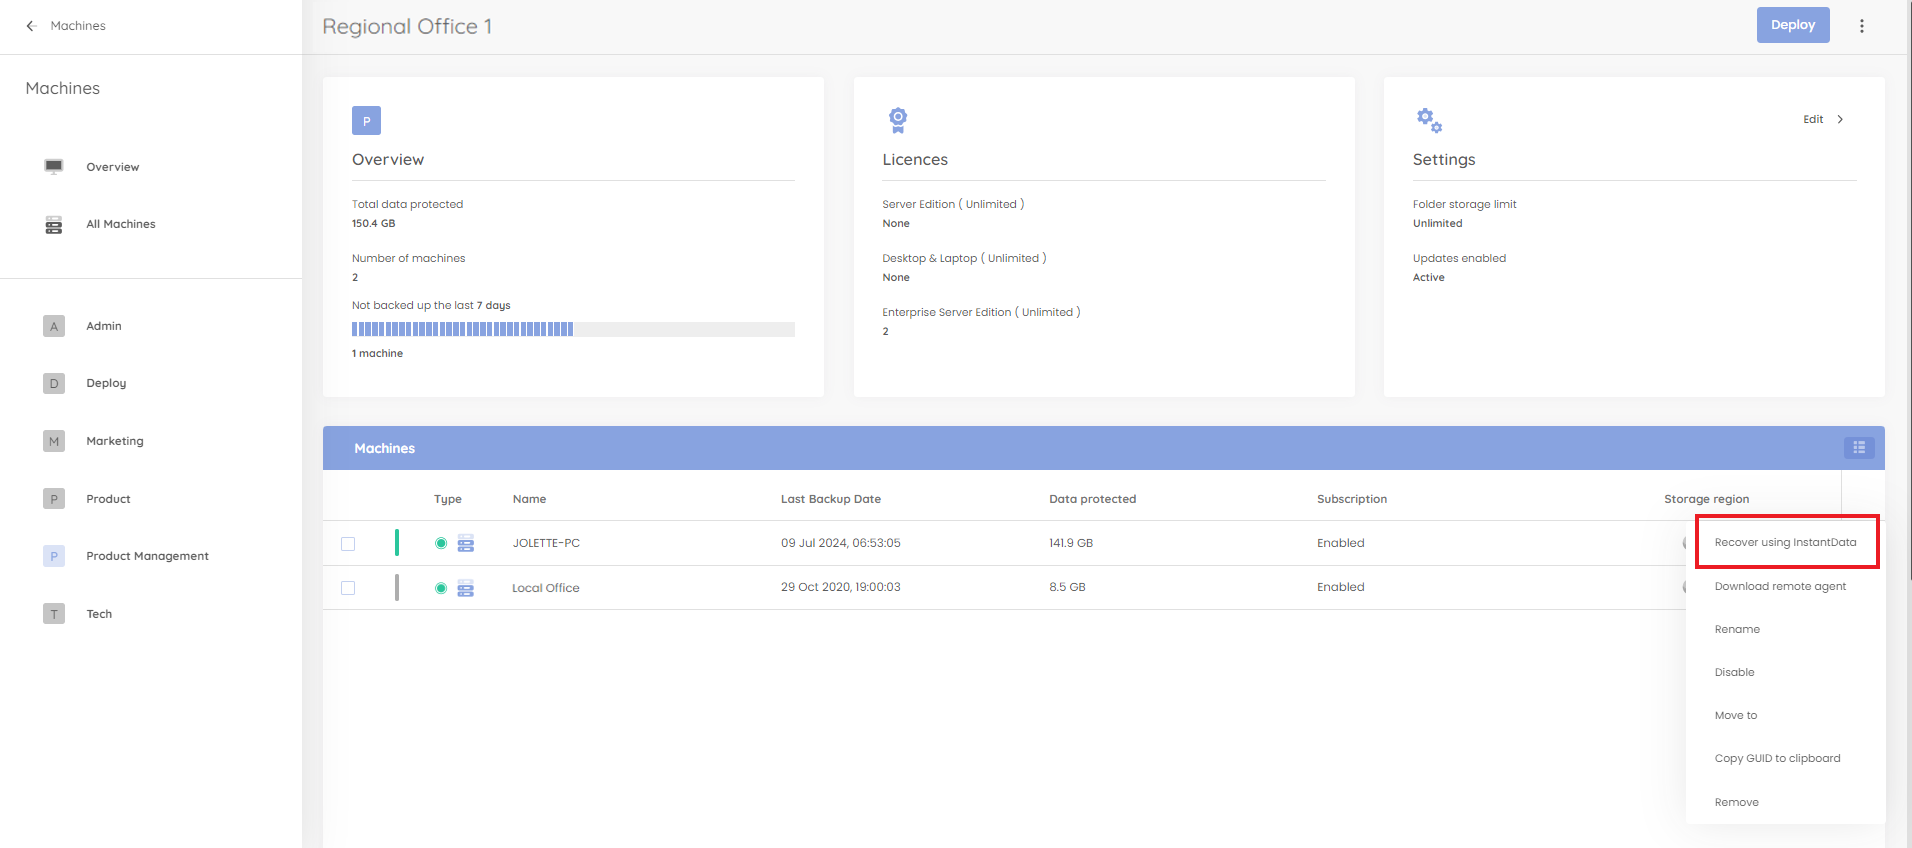
RedApp
Locate the machine you want to recover. Expand its menu on the right, and click Recover using InstantData.
Console
Choose the appropriate method below:
- I have access to the Storage Platform Console /I am an Administrator
Click the InstantData button at the top of the Console interface to open the application.

Note: If the InstantData menu option or button is not visible, see How to activate InstantData.
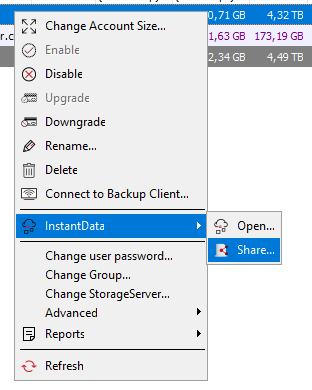
As an Administrator, you can also share a link that will provide access to InstantData with someone who does not have Console access or is unable to determine their Account or Storage Platform details. To share a link, right-click the name of the relevant Account in the Console and go to InstantData > Share....
- I have been sent an InstantData link by my Administrator
The settings will already be configured and you should be able to start recovering files immediately.
- I don’t have the Console or an InstantData link (for technical users)
InstantData can also be downloaded remotely by opening the appropriate web address for your Storage Platform/AccountServer. To download, open either of these links in your web browser:
https://AccountServerName/WebLaunch.htm
Example: https://MyPlatform/WebLaunch.htm
or
http://AccountServerName:443/WebLaunch.htm
Example: http://MyPlatform:443/WebLaunch.htm
Note: The name of your AccountServer, as well as your Account and Group details can be found in Options > Backup account in your ESE Agent.
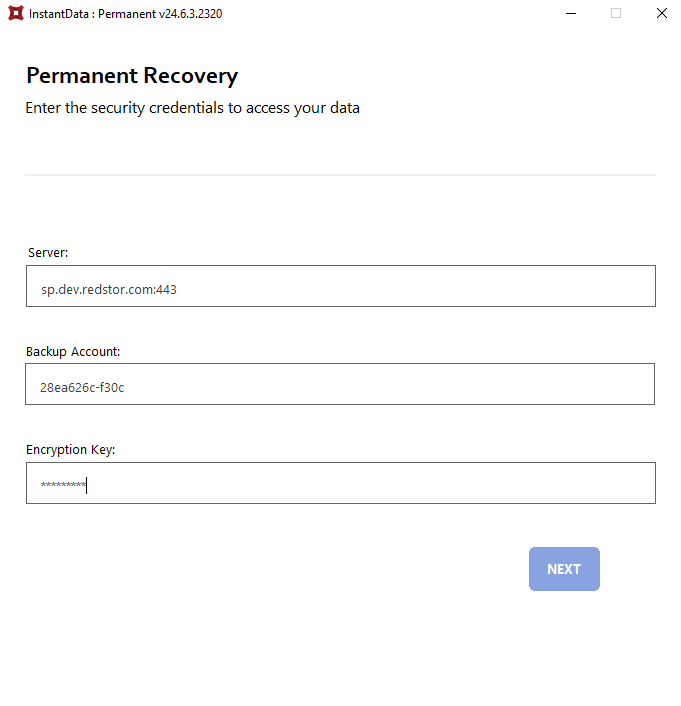
2. Connect to the Account
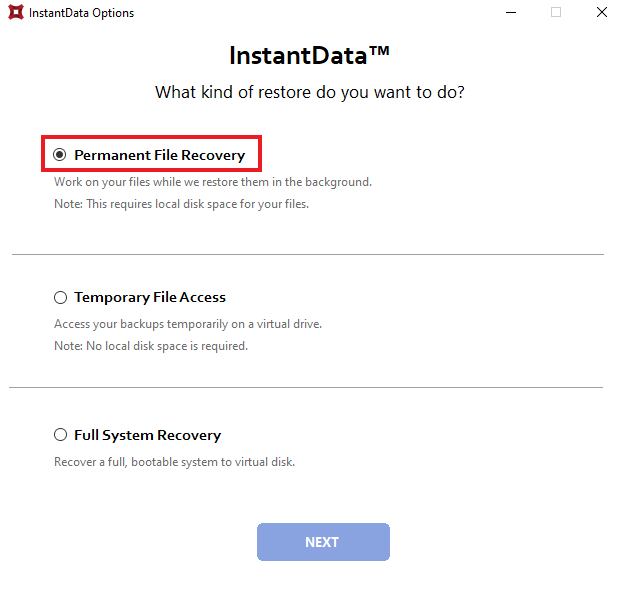
Select Permanent File Recovery and click Next.
Enter your encryption key and click Next.
3. Recover your files
A file browser window will appear. To move the desired files to an appropriate location for use by other applications, simply drag and drop them, or use right-click > Copy (or CTRL+C) and Paste.
Note: If Full System Backup is not enabled on the Account, you will only see limited files in the browser.
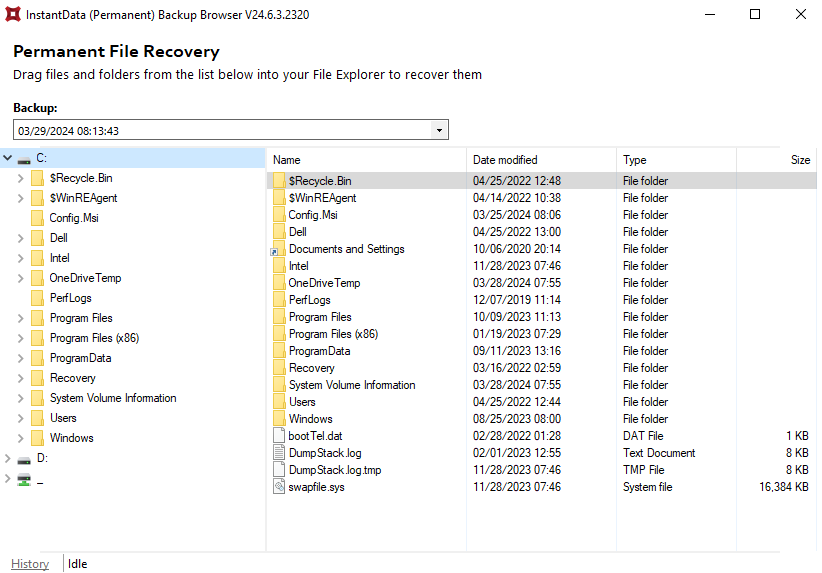
The files can be used immediately, regardless of their size. The restoring of files will continue in the background.
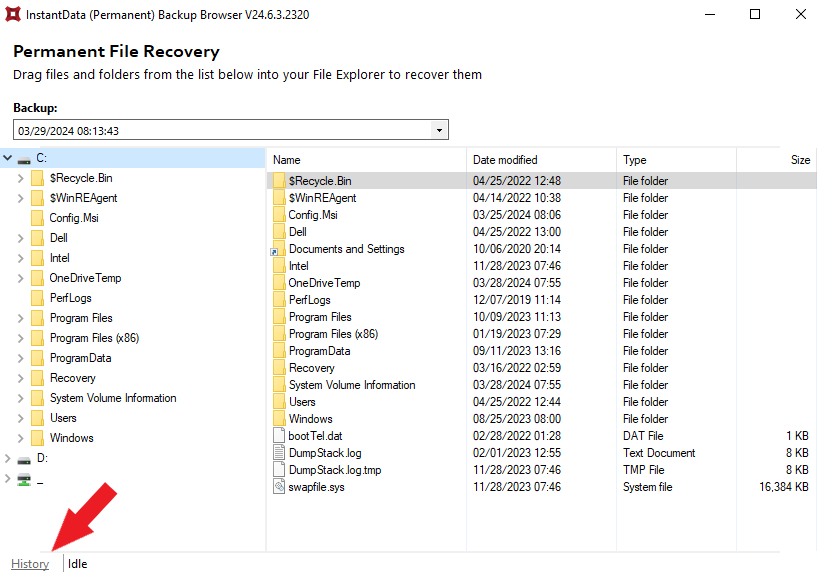
How to know when a file has been restored completely:
- A confirmation will appear in the system tray once a file has been restored completely.
- There is also a progress bar at the bottom of the InstantData browser.
- If you missed the system tray notification, click the History link in the InstantData browser to see a full list of files that have been restored.
4. After restoring files permanently
Ensure that all your files have been restored completely, then right-click the InstantData system tray icon and click Exit. The InstantData icon will disappear from the system tray.
Note: All changes made to files restored from the InstantData backup browser will remain after the InstantData app has disconnected from the Account. This differs from InstantData Temporary, where file changes are not kept by default.
Was this article helpful?
That’s Great!
Thank you for your feedback
Sorry! We couldn't be helpful
Thank you for your feedback
Feedback sent
We appreciate your effort and will try to fix the article