How to add a Collection
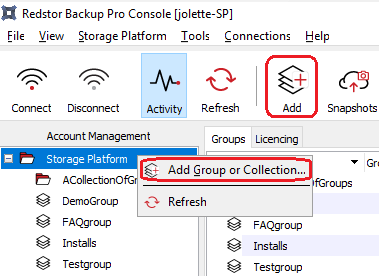
1. In the Storage Platform Console, open the Account Management view in the left-hand pane and expand the Storage Platform node.
2. Click the name of the Collection within which you want to create a new Collection, then click the Add button on the toolbar (or use right-click > Add Group or Collection).
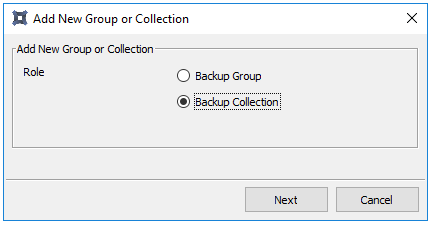
3. In the dialog box that appears, select Backup Collection.
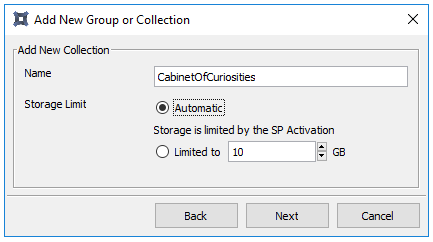
4. Create a name for the Collection. (Note that most special characters are not supported.) Enter a storage limit for the Collection, or set the amount to 0 to use the maximum storage available in the parent Collection.
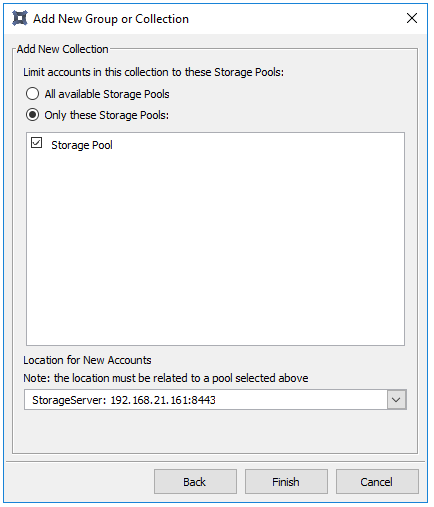
5. Specify the Storage Pools to be used and the location for new Accounts, then click Finish.
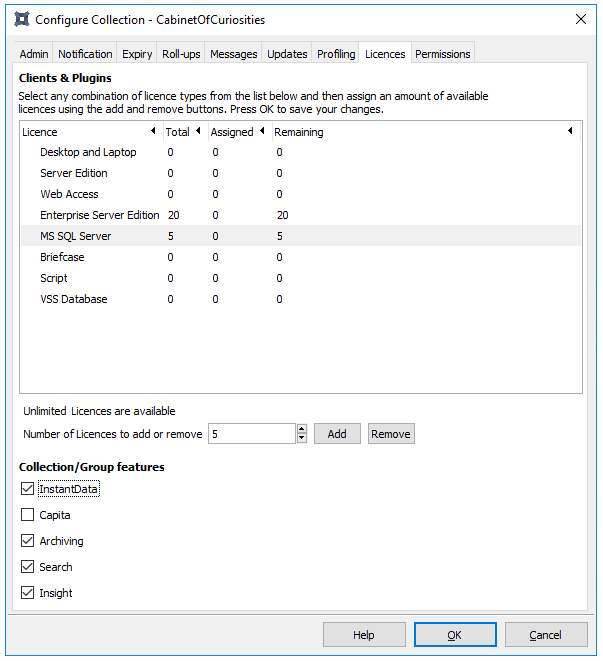
6. If you wish to enable any licences on the Collection, double-click its name (or right-click > Configure) and open the Licences tab.
Click on the type of licence you wish to add, e.g. Enterprise Server Edition, and add a number to the field at the bottom. Click Add. (If the Add button is disabled, the Collection to which this Group belongs does not have sufficient licences assigned to it. To purchase additional licences, please contact your service provider.)
Make sure the InstantData box is ticked and click OK.
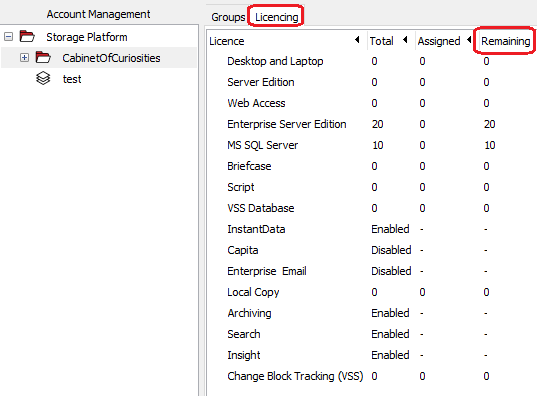
Note: To view the number of licences a specific Collection has assigned to it, click the Collection's name and then the Licencing tab in the workspace to the right. The Remaining column shows the number of licences that are still available.
How to delete a Collection
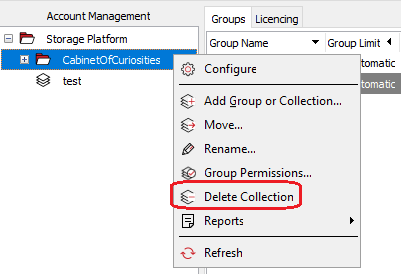
Right-click the name of the Collection you want to delete and go to Delete Collection. You can also highlight the Collection and click the Delete button on the main toolbar at the top.
Note: A Collection can only be deleted if it no longer contains any Groups.
Was this article helpful?
That’s Great!
Thank you for your feedback
Sorry! We couldn't be helpful
Thank you for your feedback
Feedback sent
We appreciate your effort and will try to fix the article