While the Integrity Check feature is a reliable way of checking the integrity of a backup account on the StorageServer and MirrorServer, discovering that something is wrong while you're already restoring data may be too late. Our data verification feature is a convenient way to regularly read all data for each of your accounts, checking that all files are present and intact.
The process is similar to a read-only standard Integrity Check, but without the time-consuming initial file scan. Another benefit is that data verification can be cancelled from the Console at any time to ease the load on the disk while rollups or restores are running. In addition, the task then resumes from the point where it was cancelled instead of starting again from the beginning. If data verification fails, an Integrity Check is triggered.
Important: On Redstor's side, automated data verification is scheduled to scan each account at least once every 30 days if possible. However, to reduce disk usage, the data verification task gives way to higher-priority tasks like roll-ups, restores and mirroring. Since one of these tasks is running for some account almost all the time, it is often the case that accounts are skipped for data verification in a given 30-day period. We recommend regularly running manual data verifications from the Storage Platform Console using the steps below.
How to run data verification
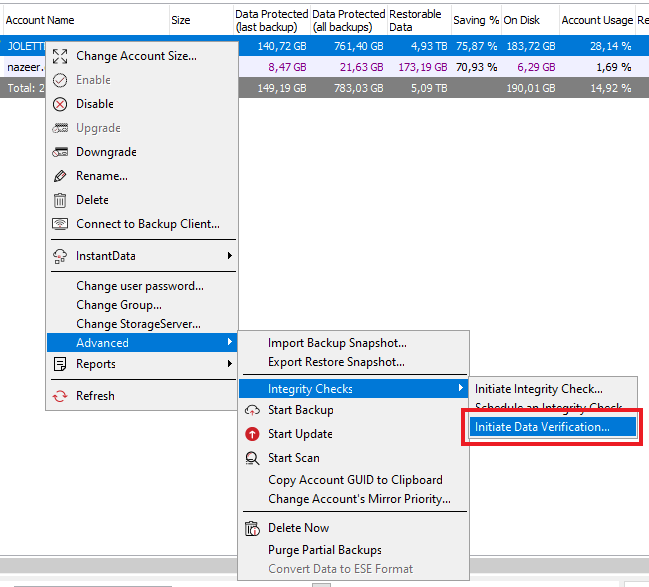
To run data verification on an account, right-click the name of the account in the Storage Platform Console and go to Advanced > Integrity Checks > Initiate Data Verification.
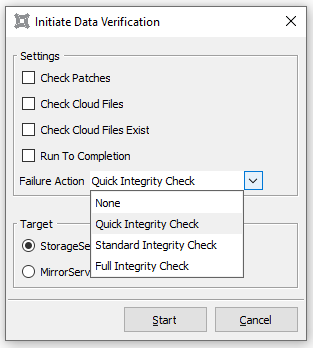
Select what you would like the system to check, as well as an action to take should the check fail. Then click Start.
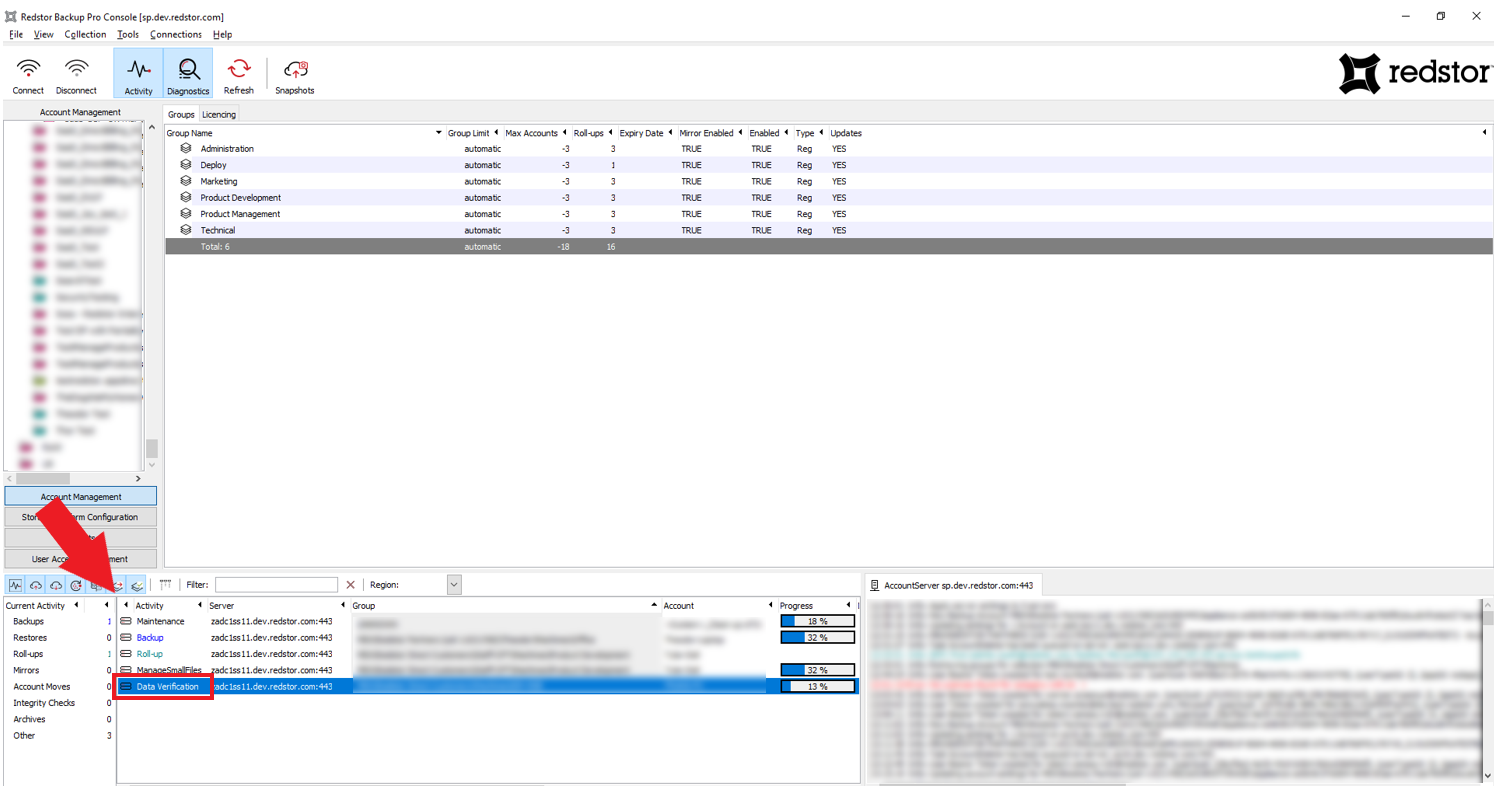
You can follow the progress of the data verification in the activity area at the bottom left.
To continuously monitor issues picked up by data verification and be informed about issues as soon as they appear, we recommend scheduling a daily run of the DataVerification report, which can be found under Other in the Console's Reports view. You can also run separate DataVerification reports by region or by server.

This report will show all the accounts that have exhibited issues in the last two months, such as in this example:
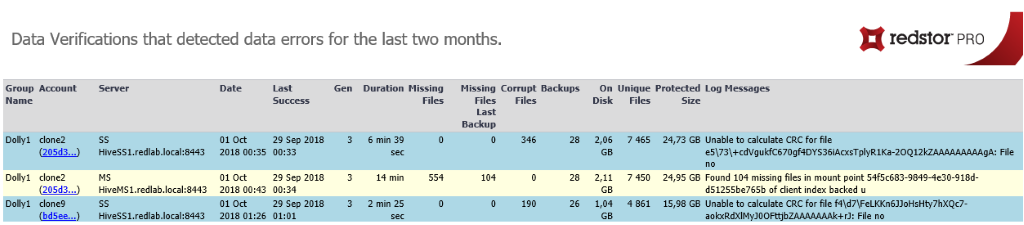
(Blue = SS, Yellow = MS)
The first part of each account's GUID is a link to that account's Integrity Check History report. Once the Integrity Check has fixed all the issues on the account and the data verification task has had a clean run, the account will no longer show up in the DataVerification report.
Managing data verification
If you host your own platform, the data verification process can be automated and customised to your needs by configuring its frequency and what action should follow a verification failure. To do this, open the StorageServer’s settings.xml file (default location C:\ProgramData\Attix5 Pro\SS_Service) and set your preferences.
- To set the period to wait before running another data verification task after a verification task has completed without errors, set
DataVerificationFrequencyDays(default is 30 days). - To set data verification to continue running on finding an error, set
DataVerificationRunToCompletiontoTrue. If set toFalse(default), the data verification task will exit as soon as the first error is found. - To set what action should be taken on a verification error, set
DataVerificationFailureActiontoNone,QuickIntegritycheck,StandardIntegritycheckorFullIntegritycheck(default isQuickIntegritycheck). Set toNoneonly if you want to allow the Storage Platform administrator to investigate before manually enabling the Integrity Check. - To set how long the resume information will remain usable in the case where the data verification task was terminated to give priority to other tasks (e.g. roll-up), set
DataVerificationResumeMaxHours(default is 24 hours).
You can also enable/disable data verification via API. To do this, go to
https://<storageserver>:port/api/system/settings
and log in as a Storage Platform admin.
Set
https://<storageserver>:port/api/system/settings/AutomatedDataVerification
as True or False, e.g.
https://192.168.23.25:8443/api/system/settings/AutomatedDataVerification=true
The following entry will be seen in the settings.xml file:
<AutomatedDataVerification choices="True,False" default="False">True</AutomatedDataVerification>
Was this article helpful?
That’s Great!
Thank you for your feedback
Sorry! We couldn't be helpful
Thank you for your feedback
Feedback sent
We appreciate your effort and will try to fix the article